Google Slides Deck Image Replacer
Automatically replace images in Google Slides presentations using Drive folder assets
Getting started
This tool automates the process of swapping out images in a Google Slides deck to create new decks for different locales. It uses a template that has had the images tagged with base filenames, and compares the base filenames to the filenames in the folder containing all the images for that locale deck. It populates the deck by matching the base filenames.
This tool runs entirely within Google's infrastructure — no data is sent to external servers.
The first time you run the tool, you'll need to authorize it to access your Google Drive and Slides:
- Open Google Slides Image Replacer
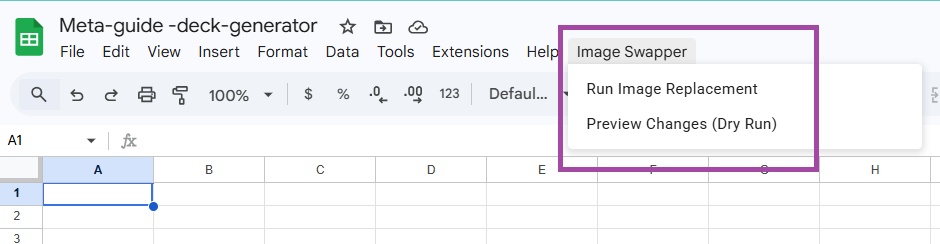
- Click Image Swapper in the menu and select either option
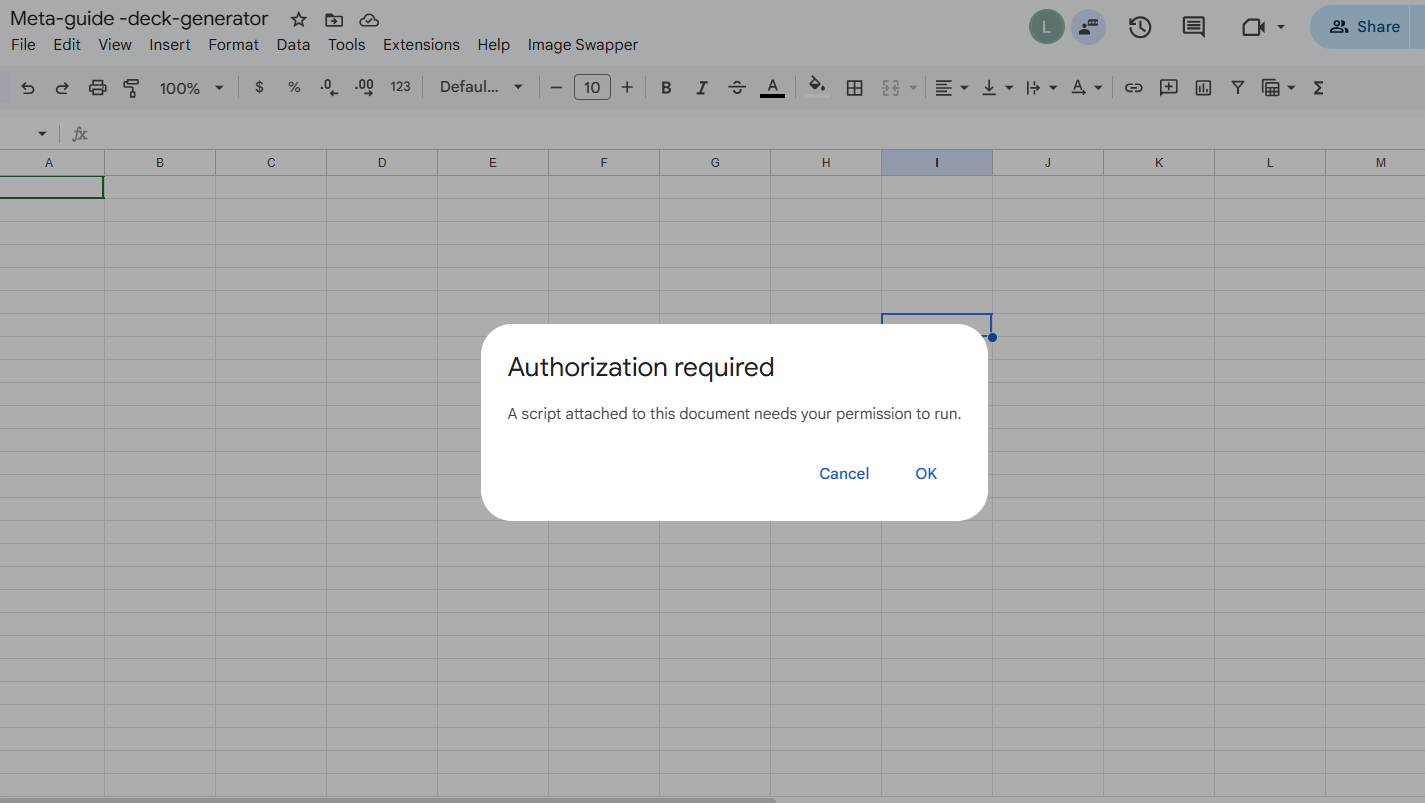
- A dialog will appear saying "Authorization required" — click Review permissions
- Select your Google account
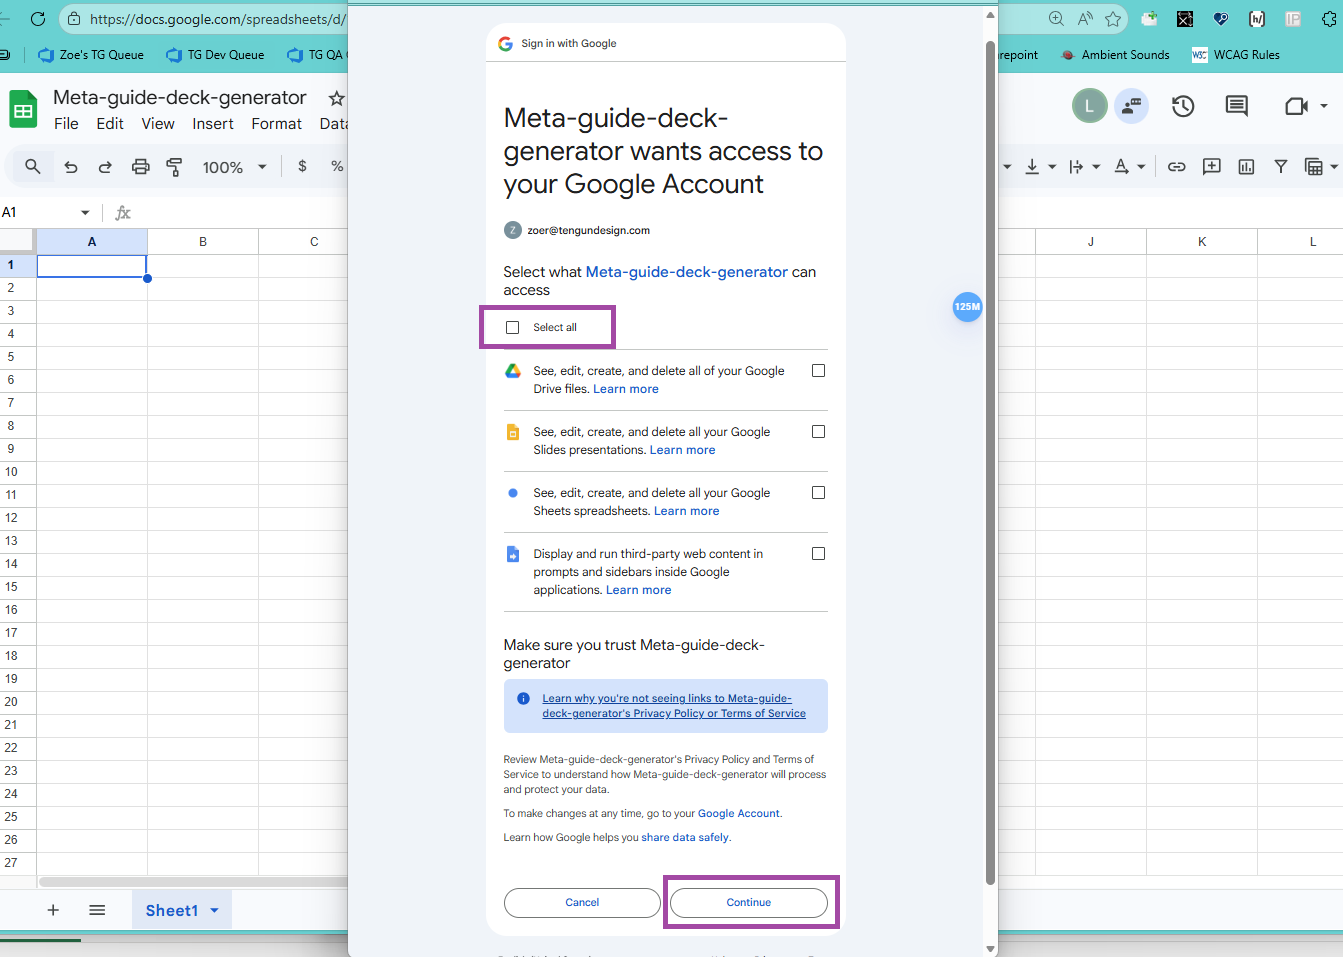
- Review the permissions, click Select all, and click Allow
-
Step 1 — Tag images in your templateAdd alt-text titles to each image you want replaced. Images without a title are skipped.
-
Step 2 — Upload replacement imagesAdd your replacement images to a Google Drive folder, named to match your alt-text titles.
-
Step 3 — Preview changesUse Image Swapper → Preview Changes to verify matches before committing.
-
Step 4 — ReplaceUse Image Swapper → Run Image Replacement to perform the replacement.
Preparing the deck template
Before using the tool, you must:
- set all template images to placeholders. This makes it easy to see if an image isn't replaced.
- tag each image in your template with an alt-text title. This title tells the tool which replacement image to use for each placeholder.
How to tag the template
- Open your Google Slides presentation
- Click on an image you want to be replaceable
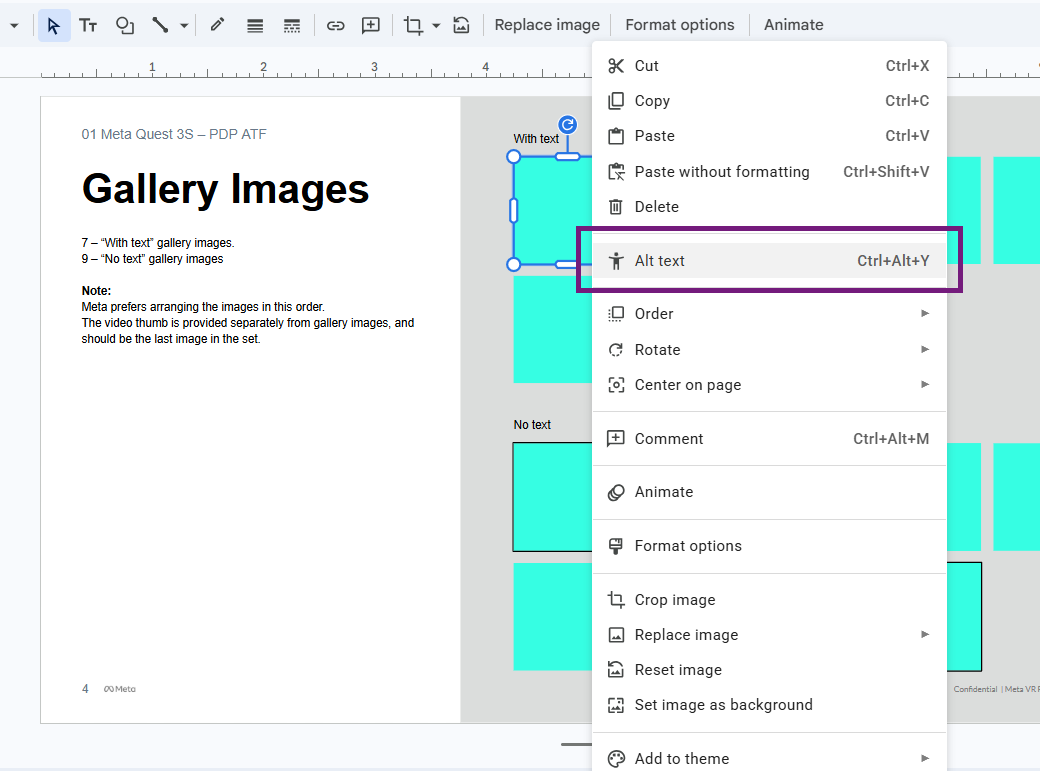
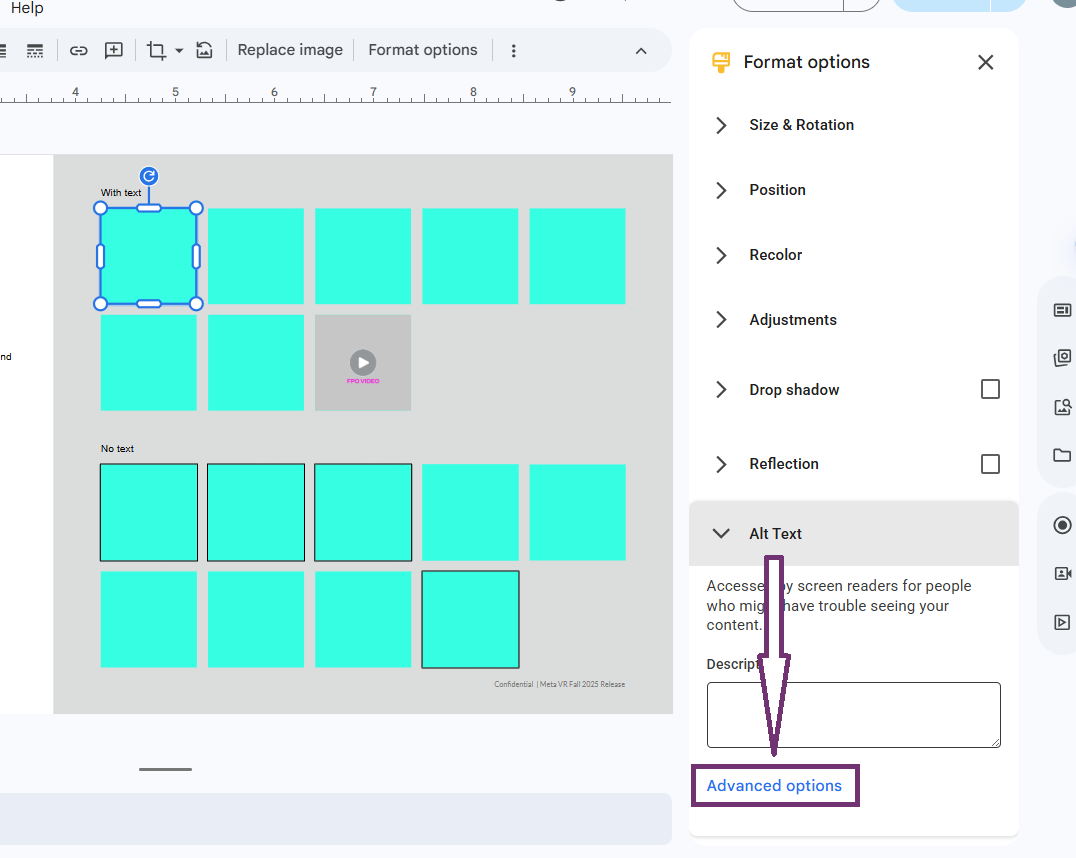
- Right-click and select "Alt text", or use the menu: Format > Alt text
- In the dialog that appears, click Advanced options
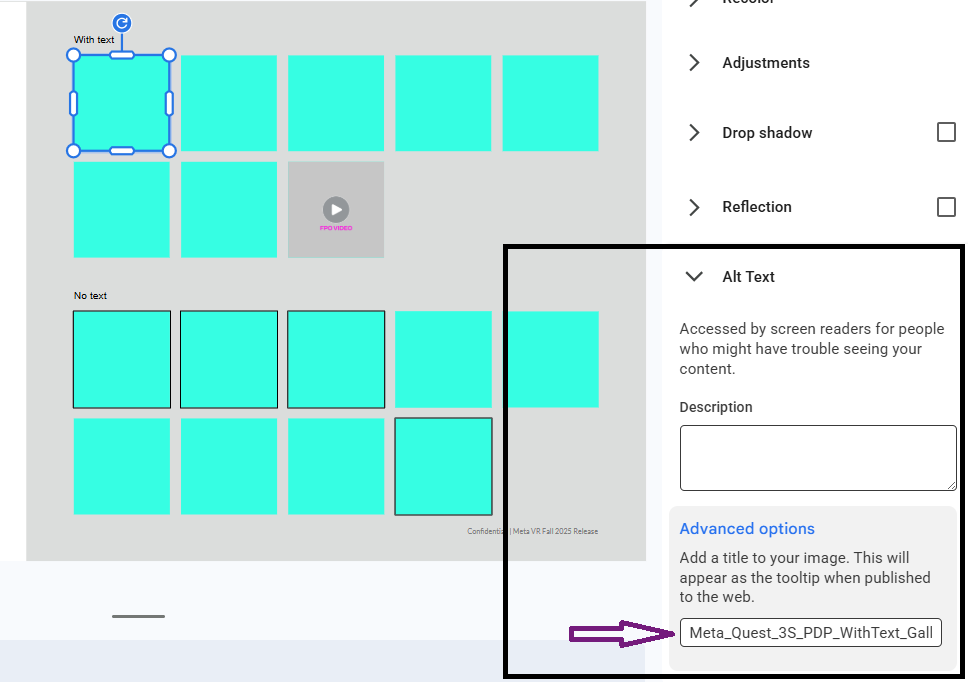
- Enter a Title that matches the base filename of your replacement image, without the locale code or the file extension
- Check each alt title you added before moving on to the next slide, Google Slides is tetchy
- Repeat for every image you want replaced
The alt-text title you set must match the filename of the replacement image, minus the file extension. For localized images, the tool automatically strips locale codes.
Because locale codes are stripped automatically, both logo_es-ES.png and logo_de-DE.png will match the alt-text title logo. This means you only need to set the title once per image slot regardless of which locale's images are in your folder.
- Replaced: Any image with a matching alt-text title
- Skipped: Images with no alt-text title set
- Also replaced: Images in master slides and layout slides — the tool checks these in addition to regular slide content
Preparing replacement images
- Create a folder in Google Drive (Shared Drives are also supported)
- Upload all images you wish to populate the deck with into this folder
- Make sure the filenames match specs
My-Replacement-Images-Folder/
├── hero-banner.png
├── product-photo.jpg
├── chart_01.png
└── logo.png
If multiple files in your folder match the same alt-text title, the tool uses the first file alphabetically. To avoid unpredictable results, make sure each alt-text title maps to exactly one file in your folder.
Using the tool
- Open Google Slides Image Replacer. You will see an empty Google Sheet, this is normal.
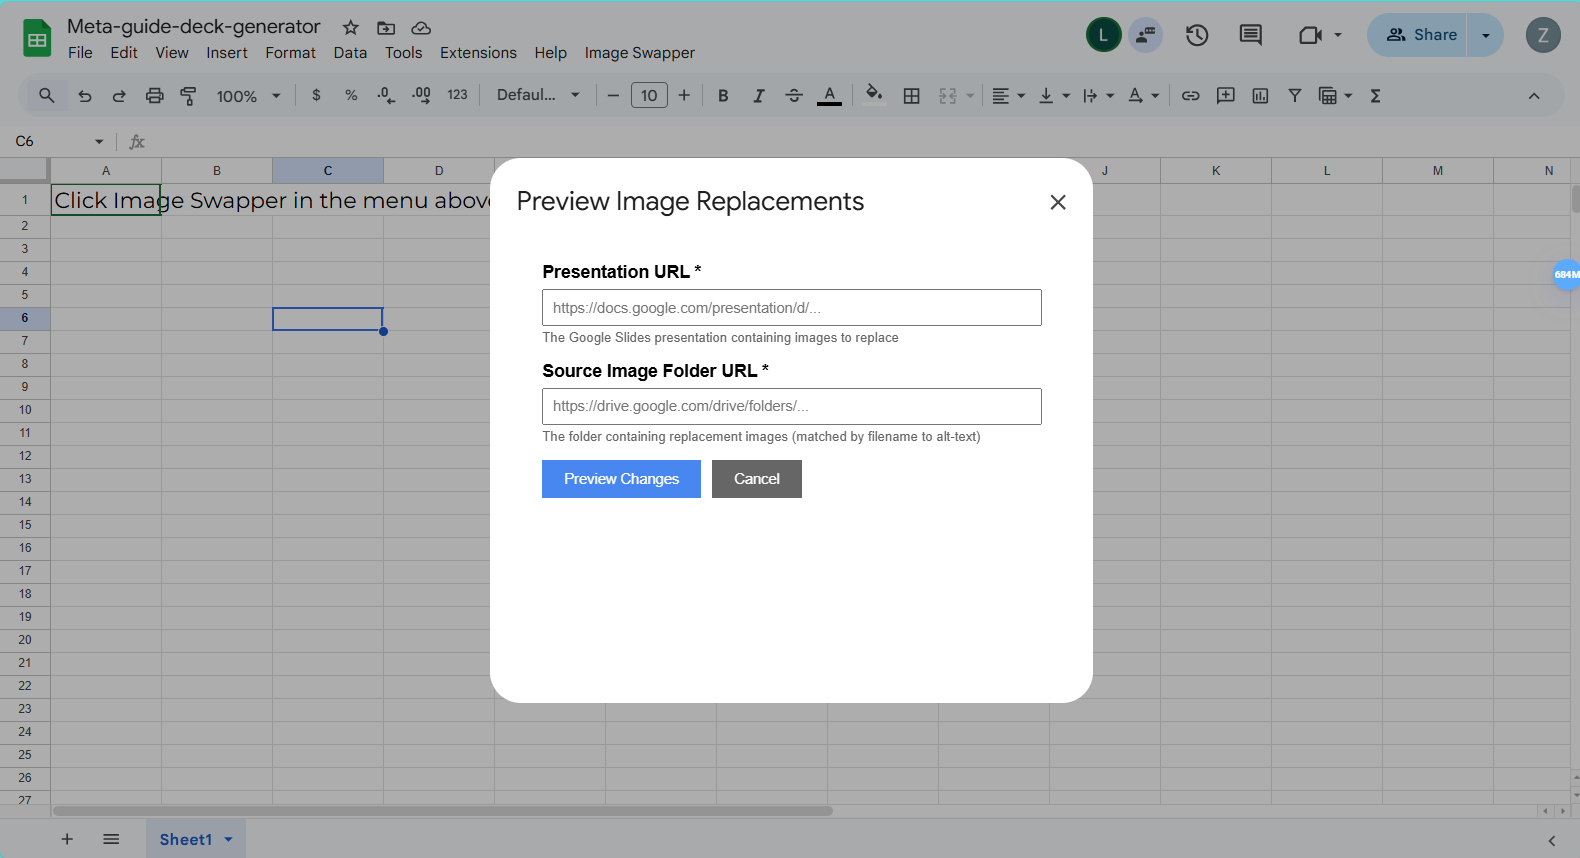
- Preview Changes (Dry Run) — Shows what would happen without making changes
- Run Image Replacement — Performs the actual image replacement
When you select either option, a dialog will appear.
- Preview Changes (Dry Run) — Shows what would happen without making changes
- Run Image Replacement — Performs the actual image replacement
Example:
https://docs.google.com/presentation/d/1ABC123xyz.../editExample:
https://drive.google.com/drive/folders/1XYZ789abc...Example:
Product Guide - GermanYou have two options. Running a preview first is strongly recommended.
Preview Changes (Dry Run)
Select Image Swapper → Preview Changes (Dry Run) to run a dry-run without modifying or copying anything. The results will show:
- Matched — Images that will be successfully replaced
- Failed to match — Images with alt-text titles that couldn't be matched to any file in your folder
- Skipped — Images without alt-text titles
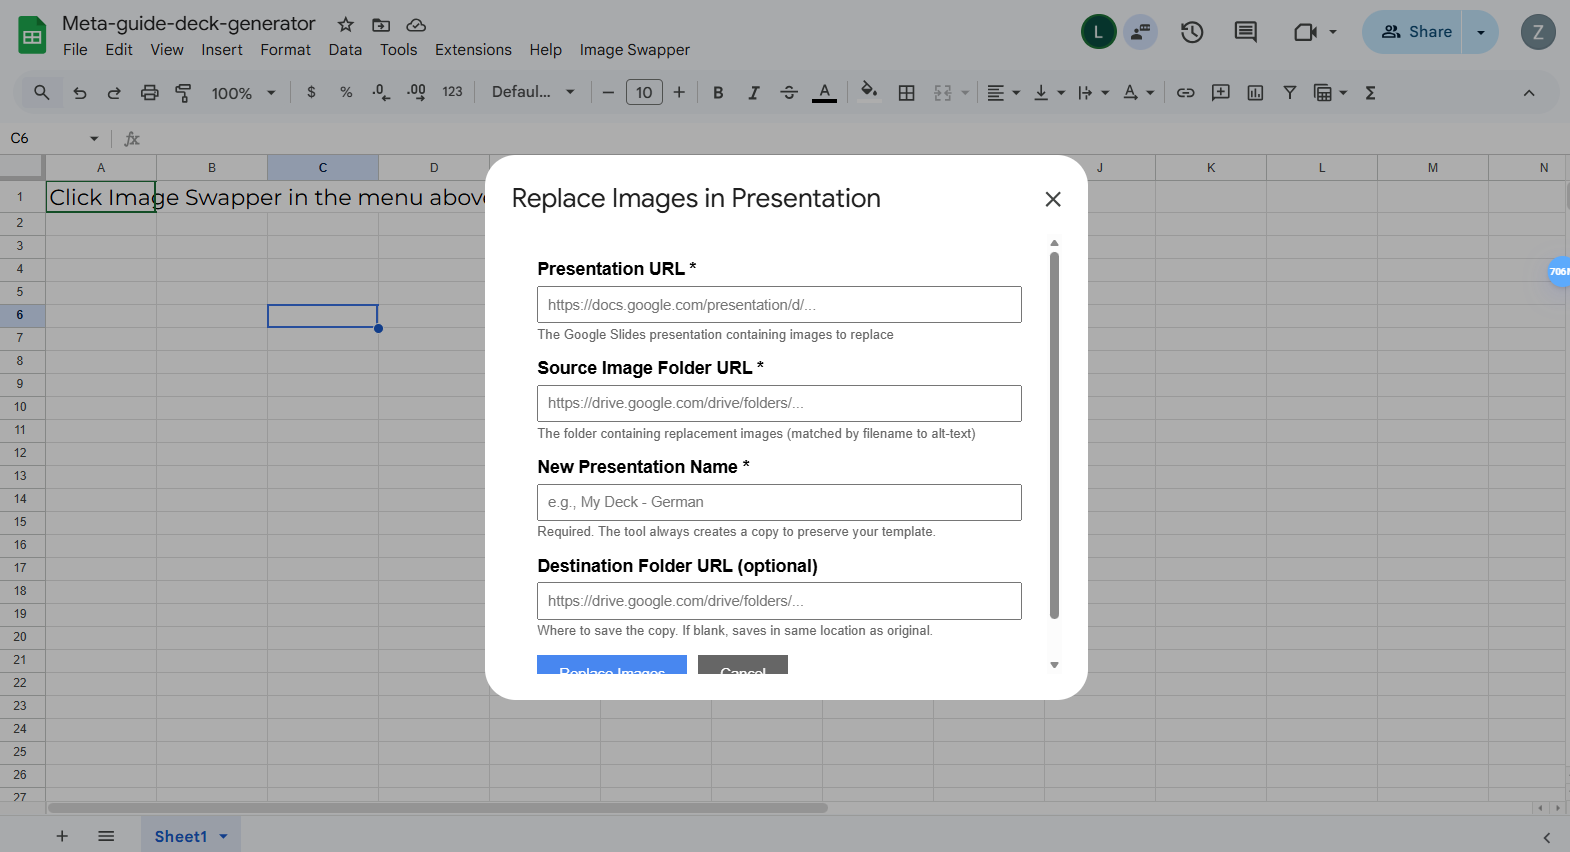
Run Image Replacement
Select Image Swapper → Run Image Replacement to perform the replacement. The tool will:
- Create a copy of your template with the name you provide
- Replace all matched images in the copy with the new versions from your Drive folder
- Save the new presentation to your specified destination folder (or the same location as the original)
- Display a summary with a link to open the new presentation
Understanding results
After running a preview or replacement, the tool displays a results summary broken into three categories.
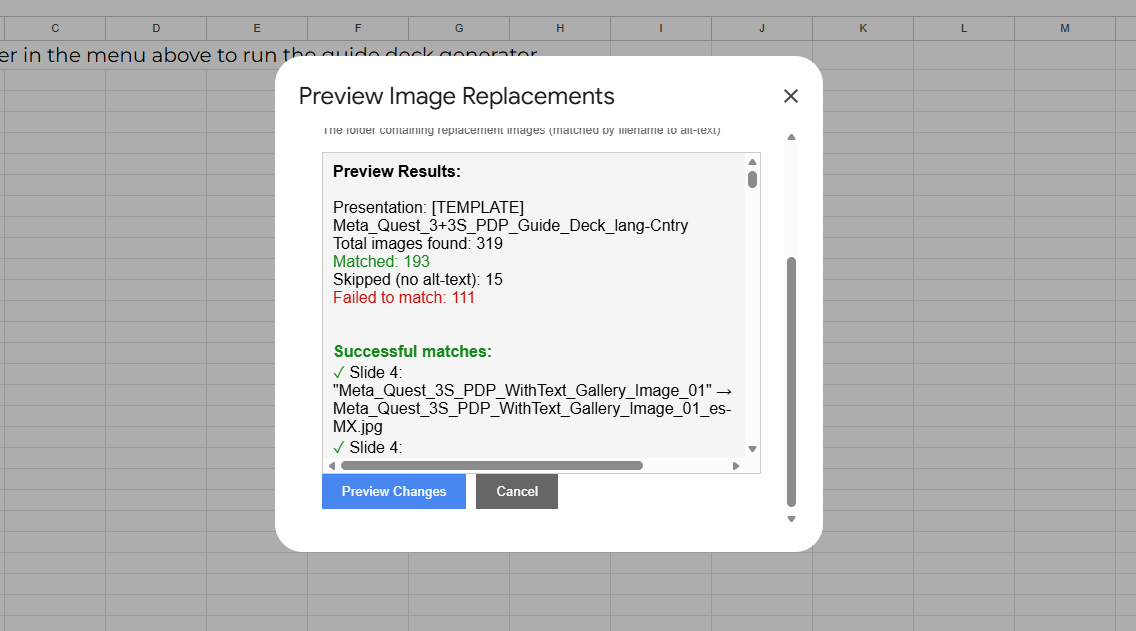
Each image that was matched and will be (or was) replaced. Includes the alt-text title from the slide, the replacement filename used, and the slide number where it was found.
Images that couldn't be matched to any file in your Drive folder. The results will show the alt-text title that wasn't found and suggestions for similar filenames already in your folder. Use these suggestions to identify typos or inconsistencies in your naming.
Images that were skipped because they had no alt-text title set. These are intentionally ignored and require no action unless you actually want them replaced — in which case, go back and add an alt-text title to the image in your template.
Troubleshooting
"Image Swapper" menu doesn't appear
"No matches found"
- Verify your alt-text titles match your image filenames exactly, without file extensions
- Check for typos or extra spaces in either the alt-text title or the filename
- Run a preview to see which images failed to match
- Confirm the correct Drive folder URL was entered — it's easy to grab a subfolder instead of the intended parent
"Image skipped" — but I wanted it replaced
- The image has no alt-text title set in the slide
- Right-click the image in Google Slides, select Alt text, and add a Title that matches your replacement filename, the same way you would tag the image in the template
- Note: only the Title field matters — the Description field is not used for matching
"Could not open presentation/folder"
- Ensure you have at least view access to both the presentation and the Drive folder
- For Shared Drive folders, confirm the folder is not restricted to specific users who don't include your account
- Verify the URL is correct and complete
"Multiple matches found"
- More than one file in your folder matches the same alt-text title after locale code stripping
- The tool uses the first file alphabetically — check the results to confirm it picked the right one
- If it picked the wrong file, rename or remove the unintended match from the folder
Wrong image replaced a slot
- Your original template is untouched — nothing is permanently broken
- Check that the alt-text title in the slide and the filename in Drive match exactly
- Verify there are no duplicate or similarly-named files in the folder causing an unintended alphabetical match
- Correct the naming, then run the tool again to generate a fresh copy
Script runs slowly
- Large presentations with many images take longer to process
- High-resolution images take longer to transfer